演習
演習
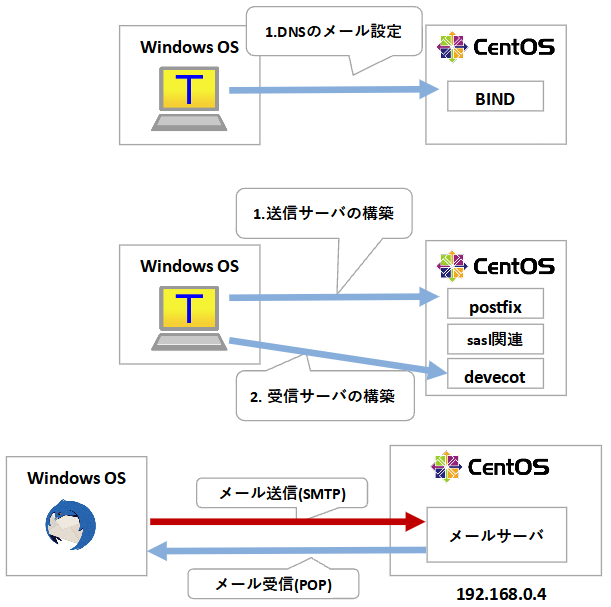
1. DNSのメール設定
2. 送信サーバの構築
①postfixのインストール
②sasl関連のパッケージのインストール
③postfixの設定
3. 受信サーバの構築
①dovecotのインストール
②dovecotの設定
4. 動作確認
①Thunderbirdのインストール
② Thunderbirdの設定
③メールの送信/受信の確認
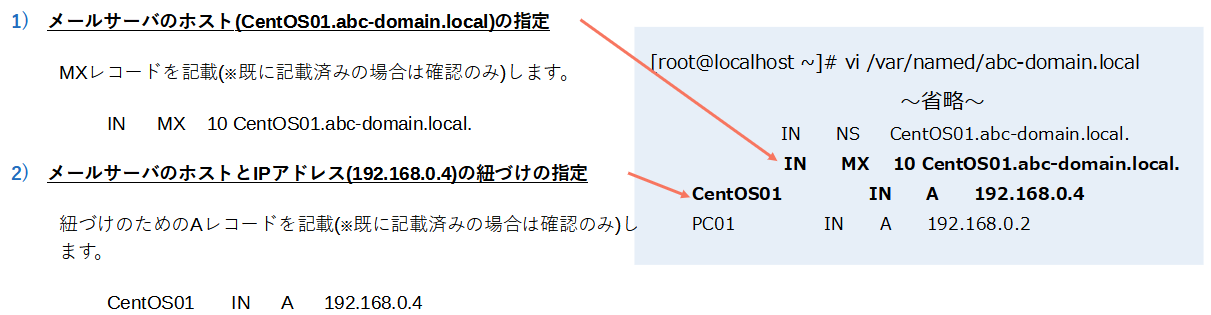
① メールサーバのホスト・IPアドレスの紐づけ(正引きゾーンファイルの編集)
1) メールサーバのホスト(CentOS01.abc-domain.local)の指定
MXレコードを記載(※既に記載済みの場合は確認のみ)します。
IN MX 10 CentOS01.abc-domain.local.
2) メールサーバのホストとIPアドレス(192.168.0.4)の紐づけの指定
紐づけのためのAレコードを記載(※既に記載済みの場合は確認のみ)します。
CentOS01 IN A 192.168.0.4
[root@localhost ~]# vi /var/named/abc-domain.local
	~省略~
		IN NS CentOS01.abc-domain.local.
		IN MX 10 CentOS01.abc-domain.local.
	CentOS01 IN A 192.168.0.4
	PC01 IN A 192.168.0.2
図
② BINDサービスの起動
BINDサービスの起動をします。
[root@localhost ~]# systemctl restart named
①postfixのインストール
1.postfixパッケージをインストールします。
[root@CentOS01]# dnf -y install postfix
メタデータの期限切れの最終確認: 0:07:29 時間前の 2022年01月31日 09時23分09秒 に 実施しました。
...
2.postfixパッケージのインストール確認をします。
[root@localhost ~]# dnf list installed | grep postfix
postfix.x86_64                       2:3.5.8-2.el8                          @baseos
②sasl関連のパッケージのインストール
3.cyrus-sasl-plain cyrus-sasl-md5パッケージをインストールします。
[root@localhost ~]# dnf -y install cyrus-sasl-plain  cyrus-sasl-md5
メタデータの期限切れの最終確認: 0:14:51 時間前の 2022年01月31日 09時23分09秒 に 実施しました。
...
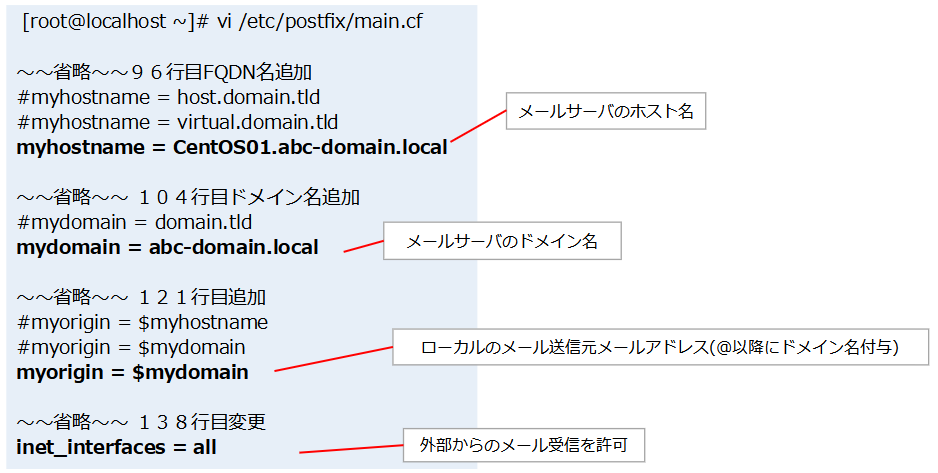
③postfixの設定
4.Postfix設定ファイルを編集します。(/etc/postfix/main.cf の編集)
[root@localhost ~]# vi /etc/postfix/main.cf

~~省略~~96行目FQDN名追加
#myhostname = host.domain.tld
#myhostname = virtual.domain.tld
myhostname = CentOS01.abc-domain.local

~~省略~~ 104行目ドメイン名追加
#mydomain = domain.tld
mydomain = abc-domain.local

~~省略~~ 121行目追加
#myorigin = $myhostname
#myorigin = $mydomain
myorigin = $mydomain

~~省略~~ 138行目変更
inet_interfaces = all
図
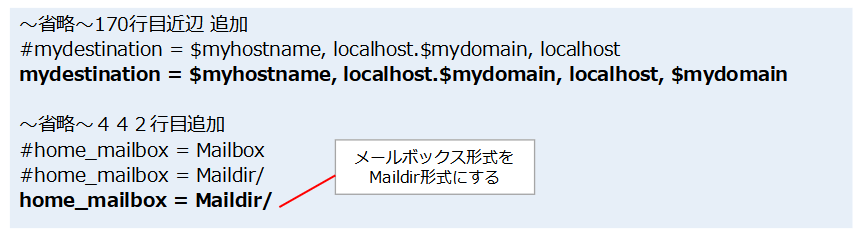
~省略~170行目近辺 追加
#mydestination = $myhostname, localhost.$mydomain, localhost
mydestination = $myhostname, localhost.$mydomain, localhost, $mydomain

~省略~442行目追加
#home_mailbox = Mailbox
#home_mailbox = Maildir/
home_mailbox = Maildir/
図
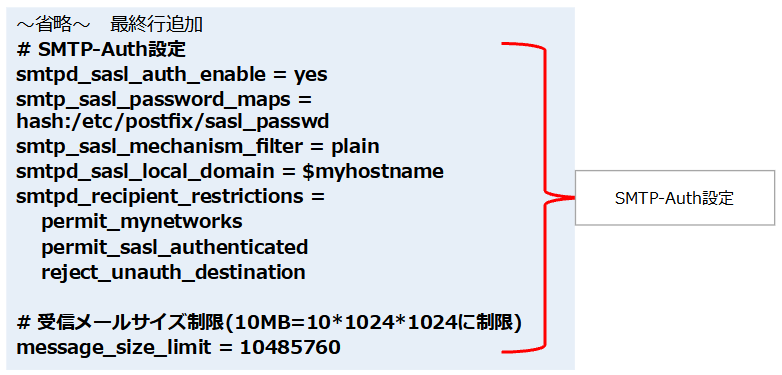
~省略~ 最終行追加
# SMTP-Auth設定
smtpd_sasl_auth_enable = yes
smtp_sasl_password_maps = hash:/etc/postfix/sasl_passwd
smtp_sasl_mechanism_filter = plain
smtpd_sasl_local_domain = $myhostname
smtpd_recipient_restrictions =
    permit_mynetworks
    permit_sasl_authenticated
    reject_unauth_destination

# 受信メールサイズ制限(10MB=10*1024*1024に制限)
message_size_limit = 10485760
図
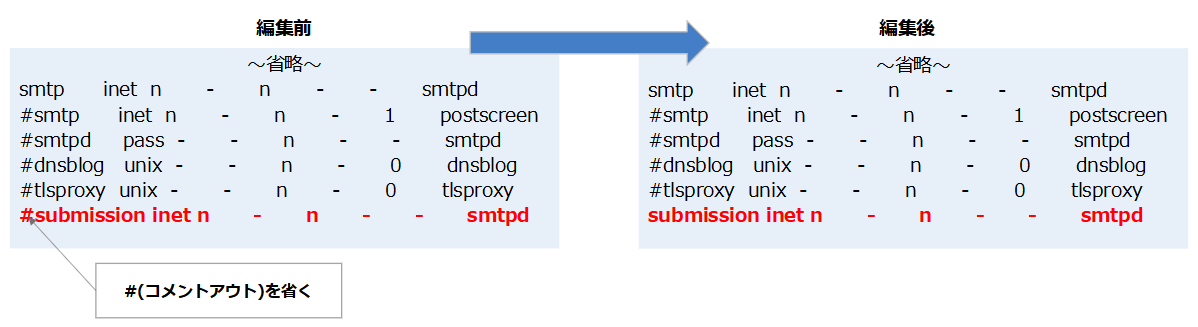
5.587番のポートの有効化(/etc/postfix/master.cfの編集)
SMTP通信のポートは25、587、465番が使用できますが、25番ポートをブロックするサービスは多いです。
そのため587番ポートを有効にするため以下の編集をします。
vim /etc/postfix/master.cf
6.postfixの設定ファイル(main.cf、master.cf)の文法チェックをします。
[root@localhost ~]# postfix check
7.Postfixの機能を起動します。
[root@localhost ~]# systemctl start postfix
[root@localhost ~]# systemctl enable postfix
Created symlink /etc/system/system/multi-user.target.wants/postfix.service → /usr/lib/system/system/postfix.service.
7. SMTP-Auth(SASL認証)の機能を起動します。
[root@localhost ~]# systemctl start saslauthd
[root@localhost ~]# systemctl enable saslauthd
Created symlink /etc/systemd/system/multi-user.target.wants/saslauthd.service → /usr/lib/systemd/system/saslauthd.service.
①dovecotのインストール
1.Dovecotをインストールします。
[root@localhost ~]# dnf -y install dovecot
メタデータの期限切れの最終確認: 0:41:03 時間前の 2022年01月31日 09時23分09秒 に 実施しました。
...
2.postfixパッケージのインストール確認をします。
 [root@localhost ~]# dnf list installed | grep dovecot
dovecot.x86_64                       1:2.3.8-9.el8                          @appstream
②dovecotの設定
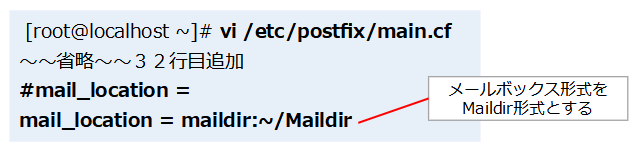
3./etc/dovecot/conf.d/10-mail.confを編集します。
[root@localhost ~]# vi /etc/postfix/main.cf
~~省略~~32行目追加
#mail_location =
mail_location = maildir:~/Maildir
図
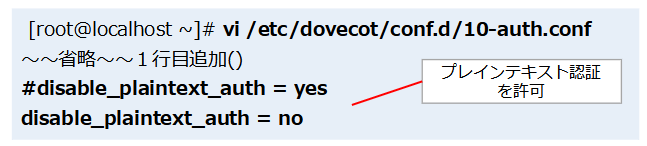
4./etc/dovecot/conf.d/10-auth.confを編集します。
[root@localhost ~]# vi /etc/dovecot/conf.d/10-auth.conf
~~省略~~1行目追加()
#disable_plaintext_auth = yes
disable_plaintext_auth = no
図
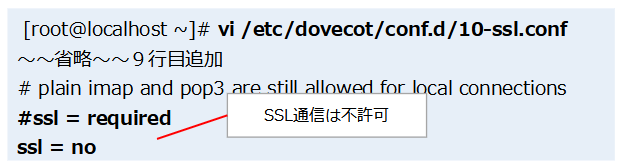
5./etc/dovecot/conf.d/10-ssl.confを編集します。
[root@localhost ~]# vi /etc/dovecot/conf.d/10-ssl.conf
~~省略~~9行目追加
# plain imap and pop3 are still allowed for local connections
#ssl = required
ssl = no
6.PostfixとDovecotを起動、自動起動します。
[root@localhost ~]# systemctl enable postfix
Created symlink /etc/systemd/system/multi-user.target.wants/postfix.service → /usr/lib/systemd/system/postfix.service.
[root@localhost ~]# systemctl start dovecot
[root@localhost ~]# systemctl enable dovecot
Created symlink /etc/systemd/system/multi-user.target.wants/dovecot.service → /usr/lib/systemd/system/dovecot.service.
当環境下におけるメール処理の流れ
最後に動作確認を行っていきます。今回の環境化におけるメール送信の動作イメージは以下の図の通りです。

①Thunderbirdのインストール
WindowsOS上に以下、URLからThunderbirdのパッケージをダウンロード、インストールを実施します。
ダウンロード先
https://www.thunderbird.net/ja/インストール手順について
https://support.pikara.jp/mail_imap/win_imap/thunderbird_imap/thunderbird60/dl_install.html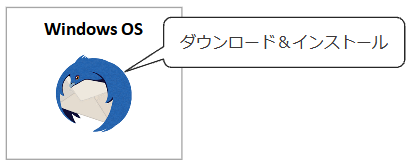
② Thunderbirdの設定
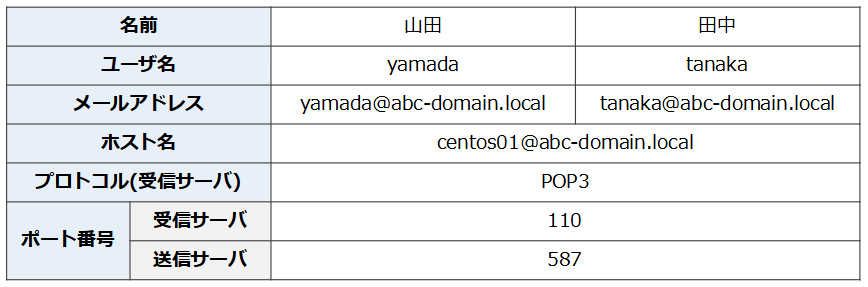
アカウントの詳細情報
以下の設定項目の2つのメールアカウントをセットアップをします。
アカウントの設定①
先ほどのアカウントの詳細情報を元に以下の図の手順に従って設定を行っていきます。
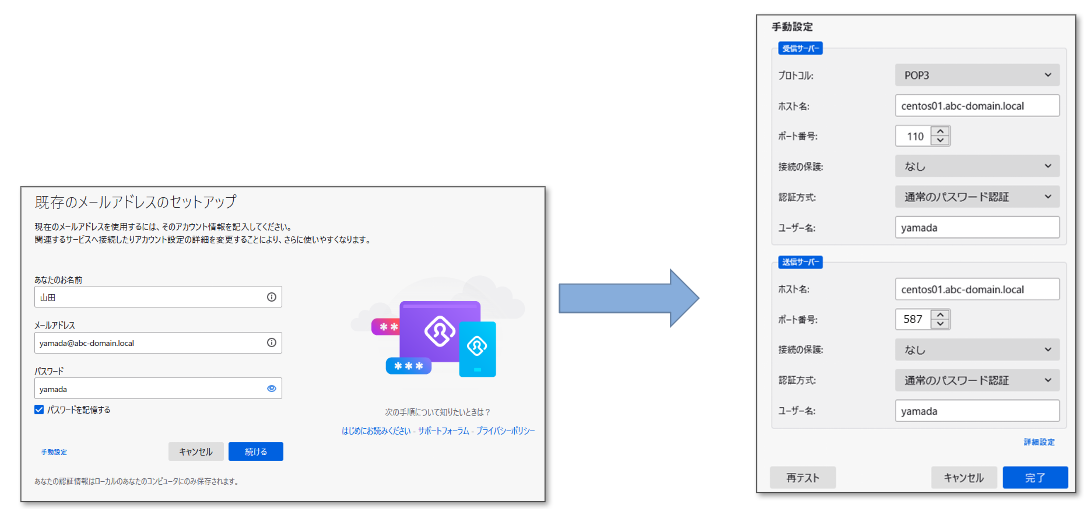
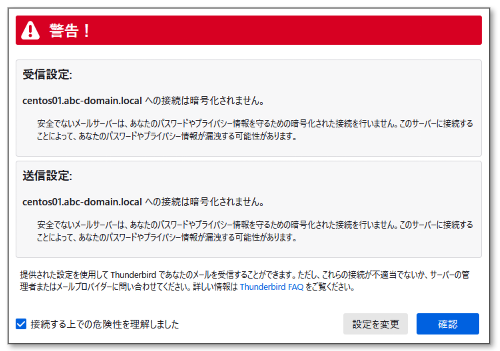
アカウントの設定②
警告が出た場合は、左下のチェックボックスをチェックして確認をクリックします。
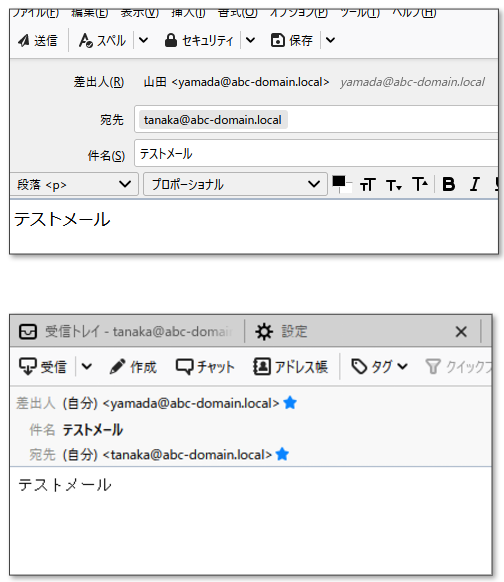
③メールの送信/受信の確認
アカウントの登録が完了しましたら、
1) メールの送信
「yamada@abc-domain.local」アカウントにて「tanaka@abc-domain.local」にメールを送ります。
2) メール受信の確認
メール送信後、「tanaka@abc-domain.local」アカウントでメールを確認します。
以上でこの講座は終了になります。